一、修改网站 nginx 配置
进入宝塔面板,找到网站设置并选择配置文件,按照下面配置进行修改(参考下图),具体域名地址请按照自己的实际情况进行修改。
- 将 “root /www/wwwroot/flarum.shixingceping.com;” 修改为 ”root /www/wwwroot/http://flarum.shixingceping.com/public;“
二、NGINX设置伪静态,否则会报错无法请求资源(宝塔可以选择wordpress伪静态模板就行了)
Nginx
# Pass requests that don't refer directly to files in the filesystem to index.php
location / {
  try_files $uri $uri/ /index.php?$query_string;
}

# The following directives are based on best practices from H5BP Nginx Server Configs
# https://github.com/h5bp/server-configs-nginx

# Expire rules for static content
location ~* .(?:manifest|appcache|html?|xml|json)$ {
  add_header Cache-Control "max-age=0";
}

location ~* .(?:rss|atom)$ {
  add_header Cache-Control "max-age=3600";
}

location ~* .(?:jpg|jpeg|gif|png|ico|cur|gz|svg|mp4|ogg|ogv|webm|htc)$ {
  add_header Cache-Control "max-age=2592000";
  access_log off;
}

location ~* .(?:css|js)$ {
  add_header Cache-Control "max-age=31536000";
  access_log off;
}

location ~* .(?:ttf|ttc|otf|eot|woff|woff2)$ {
  add_header Cache-Control "max-age=2592000";
  access_log off;
}

# Gzip compression
gzip on;
gzip_comp_level 5;
gzip_min_length 256;
gzip_proxied any;
gzip_vary on;
gzip_types
    application/atom+xml
    application/javascript
    application/json
    application/ld+json
    application/manifest+json
    application/rss+xml
    application/vnd.geo+json
    application/vnd.ms-fontobject
    application/x-font-ttf
    application/x-web-app-manifest+json
    application/xhtml+xml
    application/xml
    font/opentype
    image/bmp
    image/svg+xml
    image/x-icon
    text/cache-manifest
    text/css
    text/plain
    text/vcard
    text/vnd.rim.location.xloc
    text/vtt
    text/x-component
    text/x-cross-domain-policy;
三、
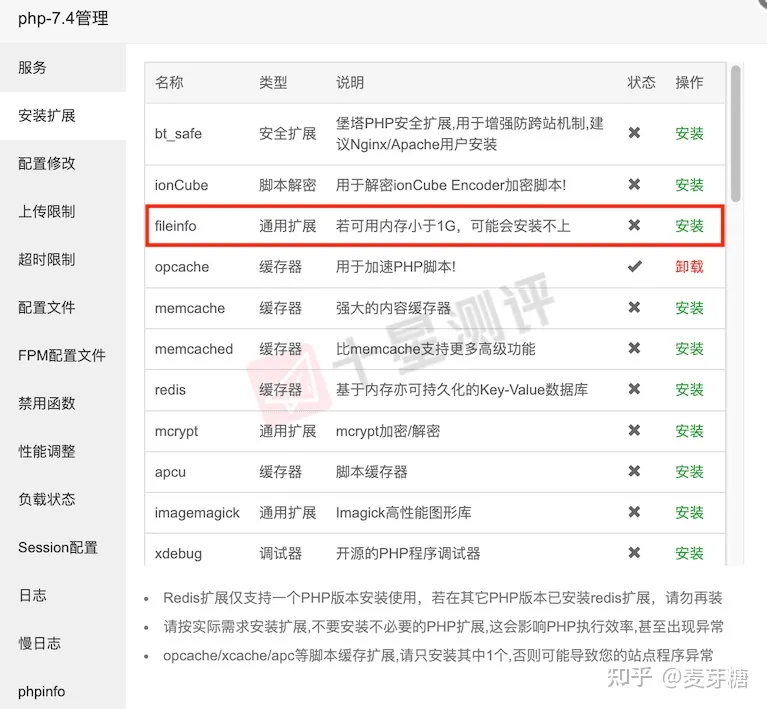
2.3 配置 PHP 拓展
进入软件商店找到 PHP 并打开设置,选择 ”安装扩展“ 安装 fileinfo(opcache、exif 非必选)
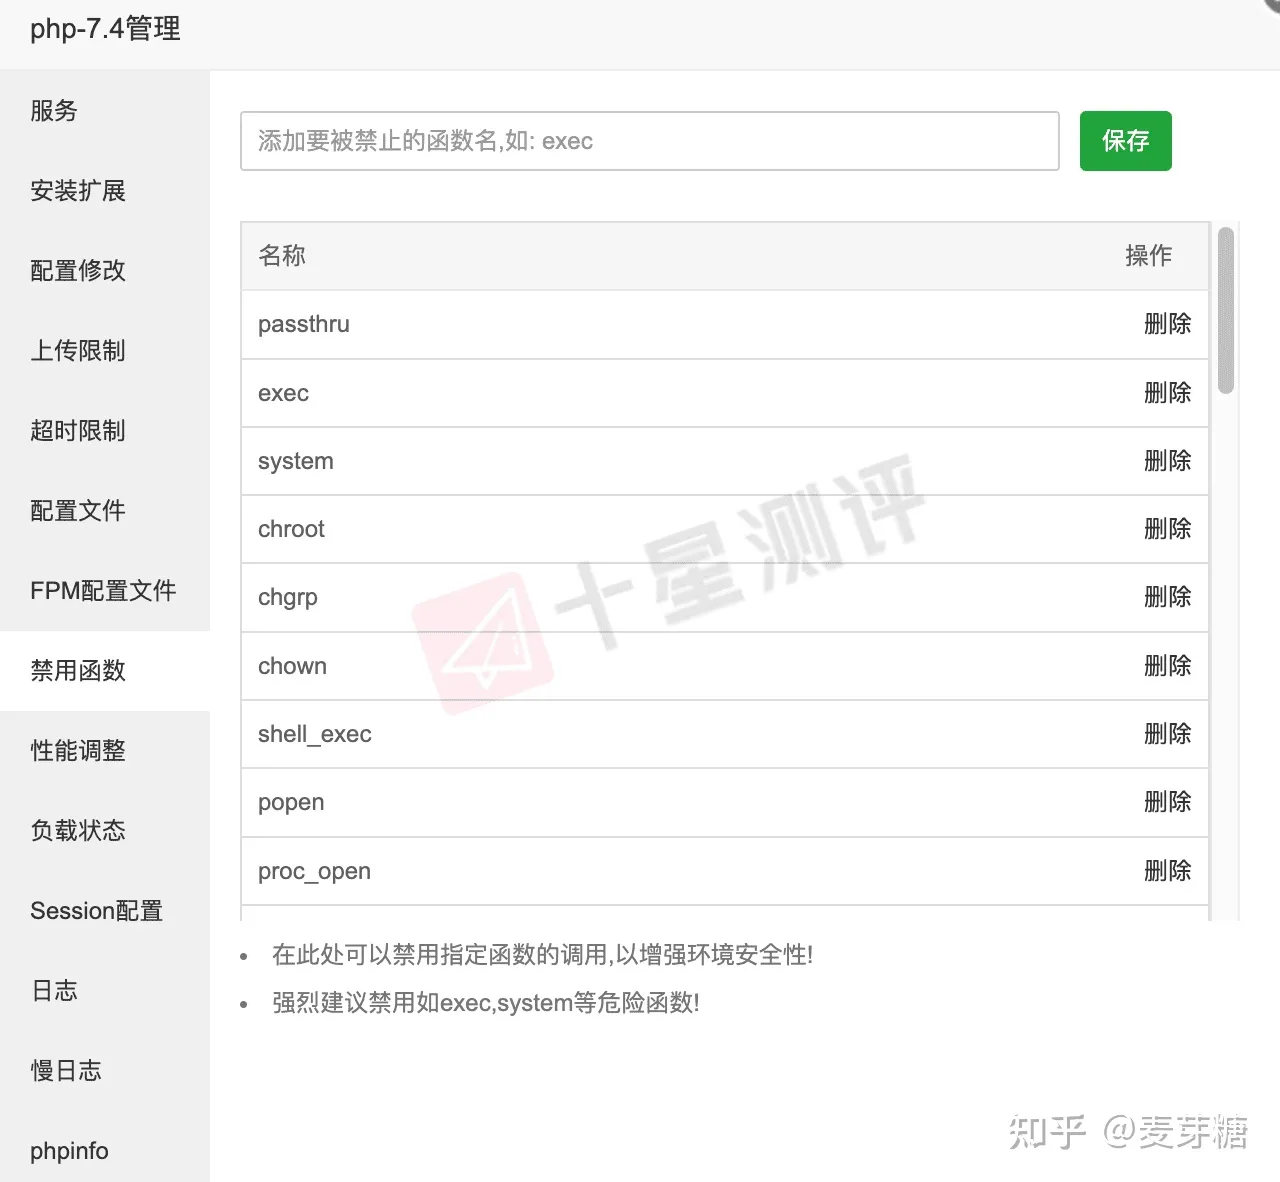
2.4 解除 PHP 函数禁用
接下来我们需要对 3 个函数进行禁用解除,在 PHP 设置页面选择 ”禁用函数“,删除掉 ”putenv“、”pcntl_signal“、”proc_open“ 这三个函数。
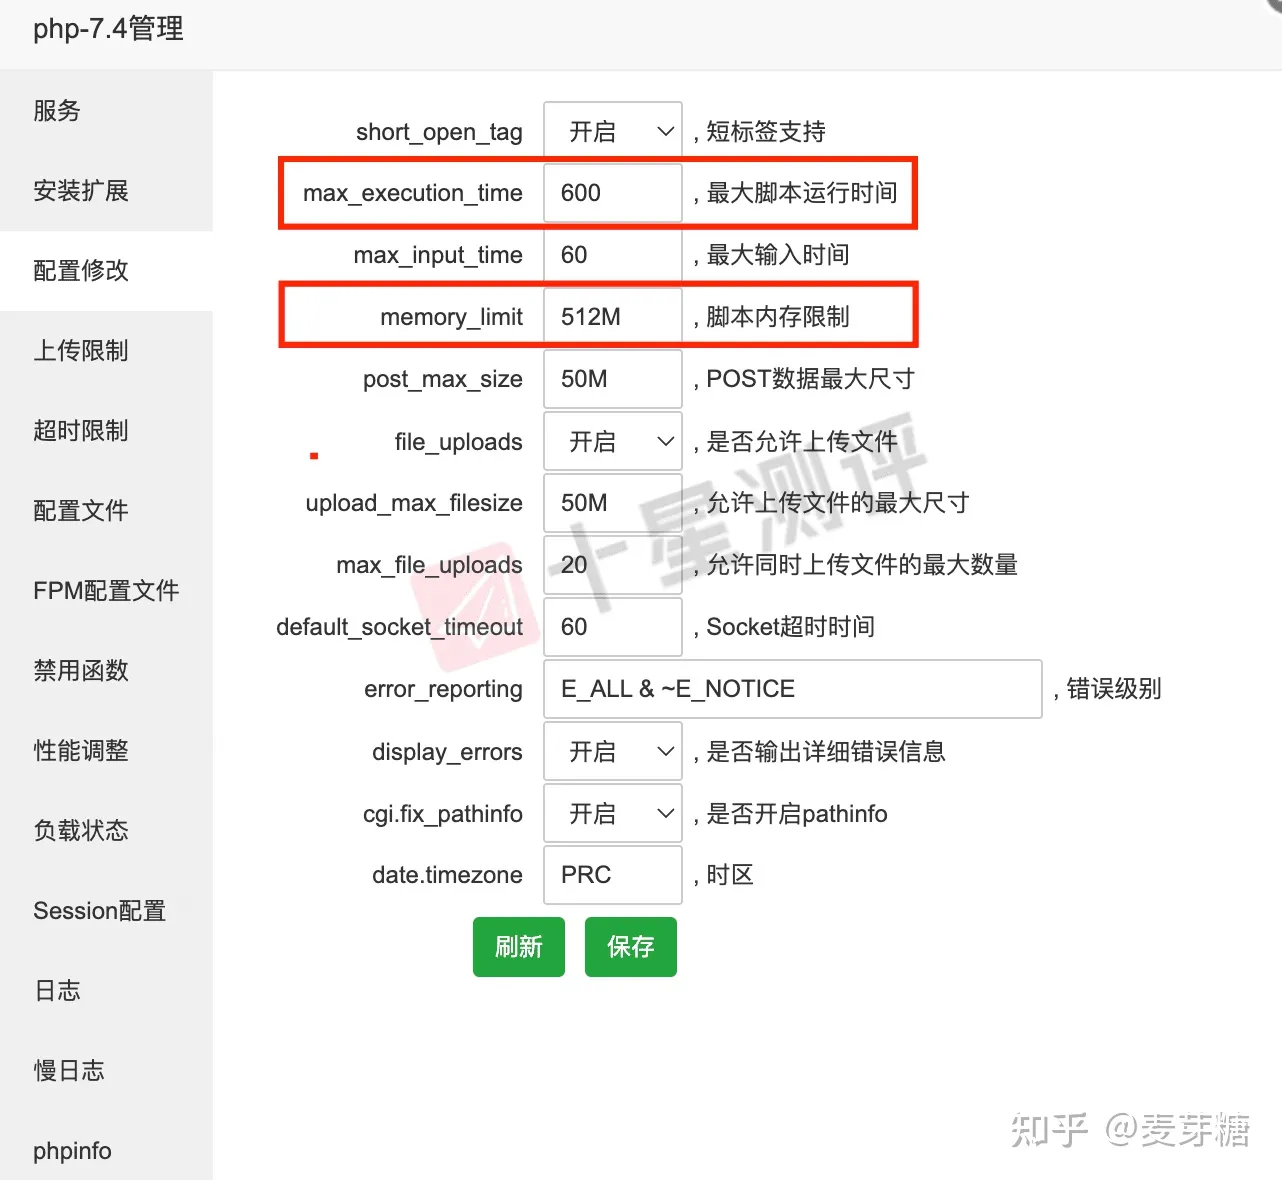
2.5 配置修改
还是在 PHP 设置管理页面,选择 ”配置修改“,对 ”最大脚本运行时间“ 和 ”脚本内存限制“ 这两项配置进行修改,具体修改的值请参考下方:
最大脚本运行时间(max_execution_time):600
脚本内存限制(memory_limit):512M 或 1024M
四、
2.7 安装 Composer
为什么需要安装 Composer?因为 Flarum 使用 Composer 来管理它的目录和扩展,所以在安装 Flarum 之前,您需要安装下载 Composer 在您的主机上。
进入用户家目录
cd ~将安装脚本下载到当前目录
php -r "copy('https://install.phpcomposer.com/installer', 'composer-setup.php');"运行安装脚本
php composer-setup.php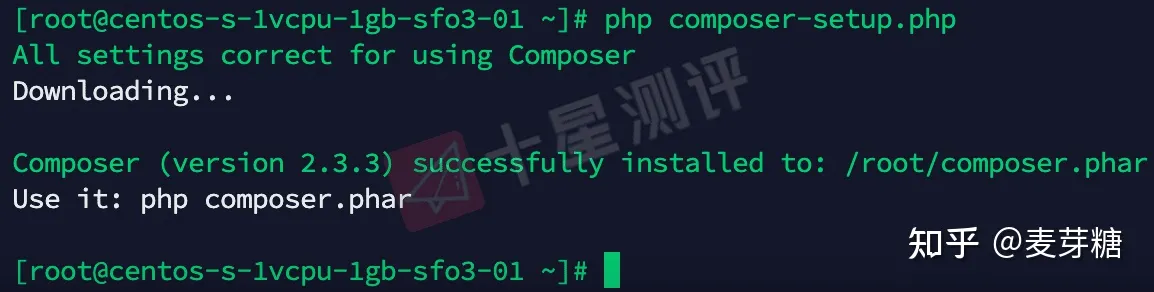
删除安装脚本
php -r "unlink('composer-setup.php');"全局安装 composer(配置系统环境变量)
mv composer.phar /usr/local/bin/composer

五、如果网站改了新域名后图片不显示怎么解决

进入宝塔PHPmyadmin,在数据库里搜索旧域名,然后全部替换成新域名